Showing posts with label Seed Saving. Show all posts

Tuesday, February 14, 2012

Chocolate Cherry Tomatoes

Do you Remember?  Yummy.
       Chocolate cherry tomatoes from Territorial Seed Company have quickly become one of my favorite tomatoes.  They are quick to ripen in only 70 days, grow profuse crops of tomatoes in the summer, and hang on late into the fall.  Picked green late into October, I have had some ripen to more than decent tasting tomatoes in December.  You can save tomato seed by a convoluted soaking and cleaning method, or I have just simply allowed a couple of tomatoes to wither and dry by themselves.  Then crumble away the husk, and save the seed.  This is the first year I tried the drying method so I was quite interested in the germination outcome.
      So bring on the paper towel.  Actually 1/2 of a paper towel as I cut it in two.  On February 10, I put on 15 seeds as I have recently been overwhelmed by too many seeds germinating.  Less than four full days later, I am set to go:


      The seeds were placed in the middle of the half sheet of towel.  Spread them out so that they don't touch each other.  The two ends of the towel were folded over the middle section, so now it is about 1/3 of the starting size.  I use an eye dropper to drop water onto the towel, just to moisten it.  Then this little packet fits nicely inside one of those cute little zip lock snack bags.  I even recycle the bags, cabage having been in this one the week before.  After only four days:

Chocolate cherry seeds started 2/10, now on 2/14/12
       This method worked great, as 13 out of the 15 seeds germinated.  I planted all 15 seeds, as the two slow ones may have popped by tomorrow had I waited.  I am thinking that planting the seeds as soon as any root shows will result in the least amount of transplant shock.  The neat thing is that you can plant just one or two seeds per cell this way and not have to cull or separate seedlings.
      Seed Swap Idea!!  I have a limited number of chocolate cherry seeds that I can swap in 15 seed bunches.  I am looking for malabar spinach seed, black pepper seed, or the little golden cherry tomatoes.  Anybody interested?

Thursday, May 19, 2011

Saving Brassica Seed

Time to harvest seed, 5-17-11

      Some of the brassica crops from last year seem fully seeded.  In any event, the plants are so large they are getting in the way and shading other plants.  The seed stalk on the left is from the mild tasting mustard plant that was a previous volunteer that overwintered.  Two good attributes to making me want to save some seed.  The yellow flowered plant on the right side are multiple plants of Beedy's Kale that overwintered in a bed of garlic.  Now the kale is shading out the garlic and needs to be removed.  The bees and wasps have loved the flowers of all of the various blooming brassicas, and flocks of Gold Finches fly off from the seed heads as I approach the garden.  But it is time for the seed harvest!

Mild Mustard seed pods, 5-17-11

      These are the seed stalks cut from the mild mustard.  The thingies that look a little like beans are the seed pods.  When they are a little smaller, they are quite tasty eaten raw.  If you open a seed pod in this green state, the seeds are green and soft.  The pods need to dry so the the seed dries to a stable storable state.  You can take individual stalks and strip them of the pods by running your clenched fist along the stalk.  Backwards, from tip to bottom, seems to strip the stems more easily for me.

Mustard Seed Pods, 5-17-11

      These are the stripped pods from the mild mustard.  They need to dry out and turn yellow.  You can actually leave them in the garden to dry, or hang them still attached to the stems from a dry hanging spot.  But as they dry, the pods will often crack and drop their seed, thus you need a container underneath.  The large paper bags formally found in grocery stores would work great to store and dry the seed stalks.  Trouble is finding the bags.
      The seed pods should dry completely and will turn yellow or a straw like color.  The pods will then be brittle and break easily, revealing the little round brown seeds.  Crush the pods by hand or any method you like better.  The pile of seeds and pod chaff can be separated by lightly blowing away the chaff.  Now the seeds are ready for planting this fall for a crop, or early next spring.  I store mine in small envelopes, away from high humidity.  The seeds are also great for sprouting for your very own zesty organic sprouts.  Something fresh from your garden in the middle of winter.  As mustard is basically ground mustard seed and vinegar, you could try to make your own.  I would rather put the seeds in a pepper mill and grind them as a fresh flavor enhancer.
      On 5/7 I harvested the mild mustard seed and Beedy's Kale.  Today I gathered Mizuna mustard seed to dry.  There are many different seeds in the garden that I still want and need to harvest.  The brassica family vegetables are supposed to cross easily so as to make seed saving pointless.  So far I have not had a problem with weird crosses.  Don't know why, so I will continue to save seed.

Wednesday, May 4, 2011

No Till Gardening

      When we moved into our current home, there was a vegetable garden already in the back yard.  The problem was that the previous owner was a chemical oriented gardener, and there was literally no organic matter in a slick clay slop.  It was October, and it must have been wet that fall, so the whole garden was a slippery, slick mess.  Lengths of 2 x 4s were scattered about the garden to provide safe places to walk.  I started adding wood chips and leaves that very first year.  Not having a roto tiller and not wanting to spend the money for one, I must have become a no till gardener by accident, long before the method was as popular as it is today.  So in the 32 years that we have been here, my garden has never been tilled.  I remember trying the double dig method for maybe 1/2 an hour, before figuring out that method is really a lot of work.  Let the worms do it, they love it.
      No till gardening has lots of benefits, not the least of which is the appearance of a bunch of volunteer seedlings.  Unlike most gardeners who rip out older ready to seed veggies, I encourage them to grow on to produce their seed.

Bellevue, 5-3-11

      Many things are in seed quite early because they overwintered in the cold frames.  All the better as I will have fresh seed and volunteers for the fall season.  The white flowering plants are arugula, the yellow are various cole crops like mustards, kale, and collards.  For some reason, the cole crops for me are breeding true, rather than crossing willy nilly as suggested by the literature.  The lettuce, spinach and chicories are soon to bolt and put up seed stalks.

Bellevue, 5-3-11

      The plant on the left is a very mild tasting mustard that overwintered under some leaf protection.  I am going to save that seed for its winter hardiness.  The plants in the middle are Beedy's Kale.  I like this variety, and the seed crop failed at Fedco last year, so I will be happy to have my own supply.
       By not tilling, seeds from garden plants have a better job of coming up naturally in both the beds and the paths.  Path volunteers need transplanting to better areas.  Mulch can not be added in deep quantities at inopportune times, as that would kill the seedlings as it does the weeds.  The weed problem is far less with no tilling, as weed seeds are not continually tilled back to the surface.  On to the volunteers:

Sunflower to be, 5-3-11

Bellevue, 5-3-11

      On the far left is baby Lamb's Quarter, a dreaded weed to many, but quite edible and delicious when young and tender.  It has a very nice nutty flavor, and the deep taproot draws nutrients from deep in the soil to be added to the compost pile.  I actually transplanted some to the garden last year, but it is now freely self seeding.  To the right of it is a small celery plant, really not needed as I have millions in their own patch.  The plant that looks like a little carrot is actually going to be a cosmos.  As I have not started my seeds at home yet, it thrills me to be finding numerous cosmos coming up on their own.

Red Sails Lettuce and Sunflower, 5-3-11

Even more Sunflowers, 5-3-11

Bellevue, 5-3-11

      Nestled in among the overwintered onions are several volunteer lettuce babies and some red russian kale.  Carrot seed from my own collected carrot tops was broadcast amongst the onions in the fall.  Lots of carrots the size of my pinkie strongly hint it might be my most successful carrot year ever (pretty easy thing to accomplish).

Bellevue, 5-3-11

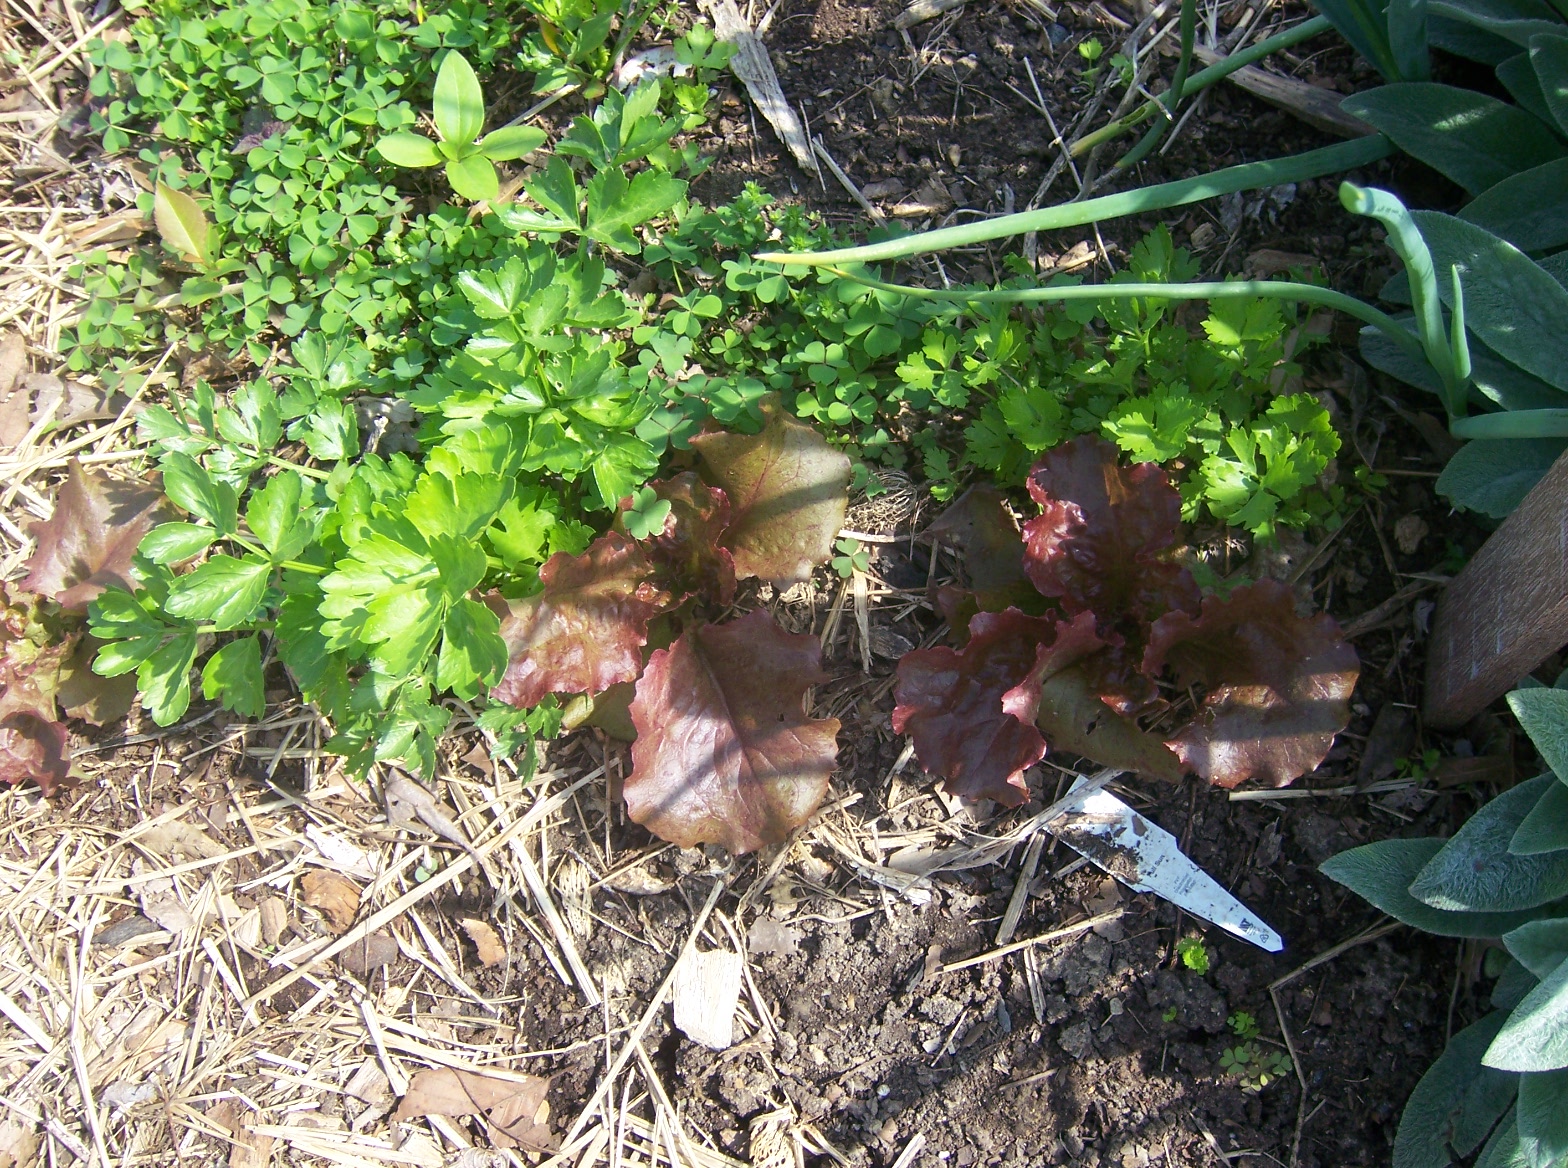
      More beautiful volunteer red lettuce, with feathery volunteer chamomile below it on the right.  To the left is a corner of the volunteer celery patch.

More lettuce, celery, and a sunflower, 3-3-11

Celery, celery, and more celery, 5-3-11

     Fellow gardener John V gave me a couple of celery plants last year.  True to form, I let them flower and seed.  Now I have millions of celery volunteers, others significantly larger than these.  I hope to get my first edible celery this year from these naturalized plants.  Home grown celery can be very strong flavored, more usable for soup stock than eating raw.  I have not tried the blanching routine yet, maybe this will be the first year.
      The baby tomato volunteers are just now starting to sprout.  Maybe that is an indication that the starts can go in the ground?

Saturday, April 23, 2011

Mustard anyone?

Mustard greens, 4/22/11

      We often times try so hard to grow things in our gardens.  Buy things and they will die.  Plant seeds and they don't germinate.  Or the bunnies or the birds eat the new starts.  Other times we do nothing and are over run by volunteers.  These light green plants are Florida Broadleaf Mustard that are coming up where I had mustard in a cold frame TWO years ago.  Go figure.  The darker green leafed plants are Purple coneflowers, and these too would not be so successful had I tried to grow them.  So if you could use either, give me a holler and come on over for a dig.
      Planting notes:  On 4/20, I planted two short rows of Chioggia beets in the seed bed just to the west of the box cold frame in the Bellevue garden.  Just to the left of those rows were two rows of Fedco White Satin carrots.  Those carrots did well last year and were delicious.  In the middle of the seed bed was a row of salsify, Tragopogon porrifolius, a first time try for me.  Say that name fast.  Heck, try to say it slowly.
      I finally planted a border row of Purple Top White Turnips along the south edge of bed number three.  Hopefully they will grow quickly and be able to be pulled.  I broadcast multiple tablespoons of home grown and harvested carrot seed along the north side of bed number two.  The carrots seeded the same way in the onion bed are coming along nicely.  When I pulled a clump of weed grass out last week, three small carrots pulled out as well.  The largest was about the size of my little finger.  I made three holes in another area of the bed and stuck them back in.  The tops are recovering now after a couple of days of wilting.
      After having very poor germination with some nasturtium and zinnia seeds, I tried a different tack last night.  I had received a seed sprouting kit as a present, which does a great job for sprouting veggie seeds to eat.  So both of the above mentioned flowers now have a tray apiece.  If the seeds sprout, I plan on transferring them to dirt before they leaf out.  At least I can keep an eye on their development.  Will update with a progress report.

Sunday, April 10, 2011

Seeds to Be

      For the last couple of years, I have been leaving some plants to go to seed.  Some to collect, and some to be left to self seed for volunteers.  The other added benefit is the attraction of beneficial insects to the flowers, especially the early blooming flowers from the cold frame plants.  The members of the cole family supposedly cross pollinate very easily, so it is not suggested to save seed.  I figured that since you can eat the leaves from broccoli, cabbage, kale, collards, etc., what difference would it matter if you did get a cross.  Having harvested seed from last summer, everything appears to be breeding true!  Go figure.  With that in mind, I will be letting many more veggies go to seed so that I can collect for next year.
      Another benefit to allowing plants to flower, is that the young flower stalks are edible.  Our salad at lunch today was graced with yellow mizuna flowers and pretty little white arugula flowers.  The flowers taste just like what the parent crop tastes like.  The following pictures are of plants that overwintered successfully in the cold frames.  They are flowering now, as most of these veggies flower in the second year.

Territorial Chinese Cabbage, 4/9/11


      The plant above is a miniature chinese cabbage from Territorial Seed Co. called Tenderheart.  It is best grown late in the summer for fall harvest, and is great because the heads are smaller than some of those big chinese cabbage that can take two weeks for two people to polish off.  The glass frame at the right of the picturr is an attempt to keep the deer off of the radicchio.

Tatsoi gone to flower, 4/9/11
     
Mizuna mustard, 4/9/11

Arugula with white flowers, 4/9/11

Mild volunteer mustard, 4/9/11

      The mustard plant above overwintered with straw and leaves covering it as deer protection.  It is a very tasty mild mustard green, and I am thrilled that it is throwing a flower spike.  I am certainly going to save this seed, and need to come up with a name for the seed.
      The seeds collected soon from these and other overwintered plants will provide fresh seed for the starts of the 2011 fall garden.  Recycling at its best.